Sunday, 5 October 2014

Life is a Cabaret Part 1


I was first asked by Bruiser Theatre Company to be Costume Designer and Supervisor on their production of 'Cabaret' back in May.  It was to be my first experience designing for theatre, working with director Lisa May.  I had celebrated a big 40th birthday in April, and I am always up for new adventures and challenges.

The celluloid story of Cabaret is famously told by Liza Minelli as Sally Bowles, in Bob Fosse's 1972 direction.  Leading us underground and into a seedy, sexy world of broken down colourful characters, its where many of us get our first introduction into the sights and songs of the show.


Joel Grey sings 'Willkommen'
 
 
This blog is all about the Cabaret costume journey, and will be in 3 parts, due to the immense number of styles that were designed and produced.  I will also be posting lots of other photos from the journey on my facebook site https://www.facebook.com/ColourandCloth.  Give me a LIKE when you are there to get lots of updates!
If you see a photograph not credited, please email me with the details and I will give credit where it is due.
 
As early as May there were promotional marketing posters to be photographed.  These demanded being very creative with time, money and resources.  Turned out, 99% of the costume supplied for the photo shoot came from my own closet! Perhaps there is a little of Sally Bowles in me..
 
 
I teach Level 3 BTEC Costume at Belfast Metropolitan College BMET and my students had just completed their 32 week course.  The timing of this show gave them a great opportunity to be involved and increase their skills and make contacts within the industry.  From the course we had Janine, Julie-Ann, Lisa and Alex.  With Erica, Marc, Sophie and Claire contacting me directly via fairs, facebook and website.  Nuala came on board from Bruiser, she works at the best vintage and retro store in town The Rusty Zip, and conquered her fear of the sewing machine.  Each intern has their own costume story to tell and are the costume crew of the future.
 
Its all about networking!
 
 
First week in July saw the move in to the MAC Theatre, Belfast.  This was to become home from home until mid September.
 
 
The wardrobe room in the MAC transformed into a design and making studio.
 
Kerri Quinn a local actress from Belfast was cast as Sally Bowles.  It was great fun designing her costumes as the show allowed a lot of freedom.
 

This design was for Sallys's introduction into the show.  I wanted her first appearance to be strong, wild and spectacular.  The fringed dress was a 'find' and the headpiece was made by my costume student Eileen Curran and was featured in a lot of online and printed press. 

 
Sally maintains strong colours and sparkly fabrics with movement at the start of Act 1, but as she meets Cliff,  her colours soften, and her vunerability begins to reveal.


Costume sketch for 'Don't Tell Mama'. 
 
 
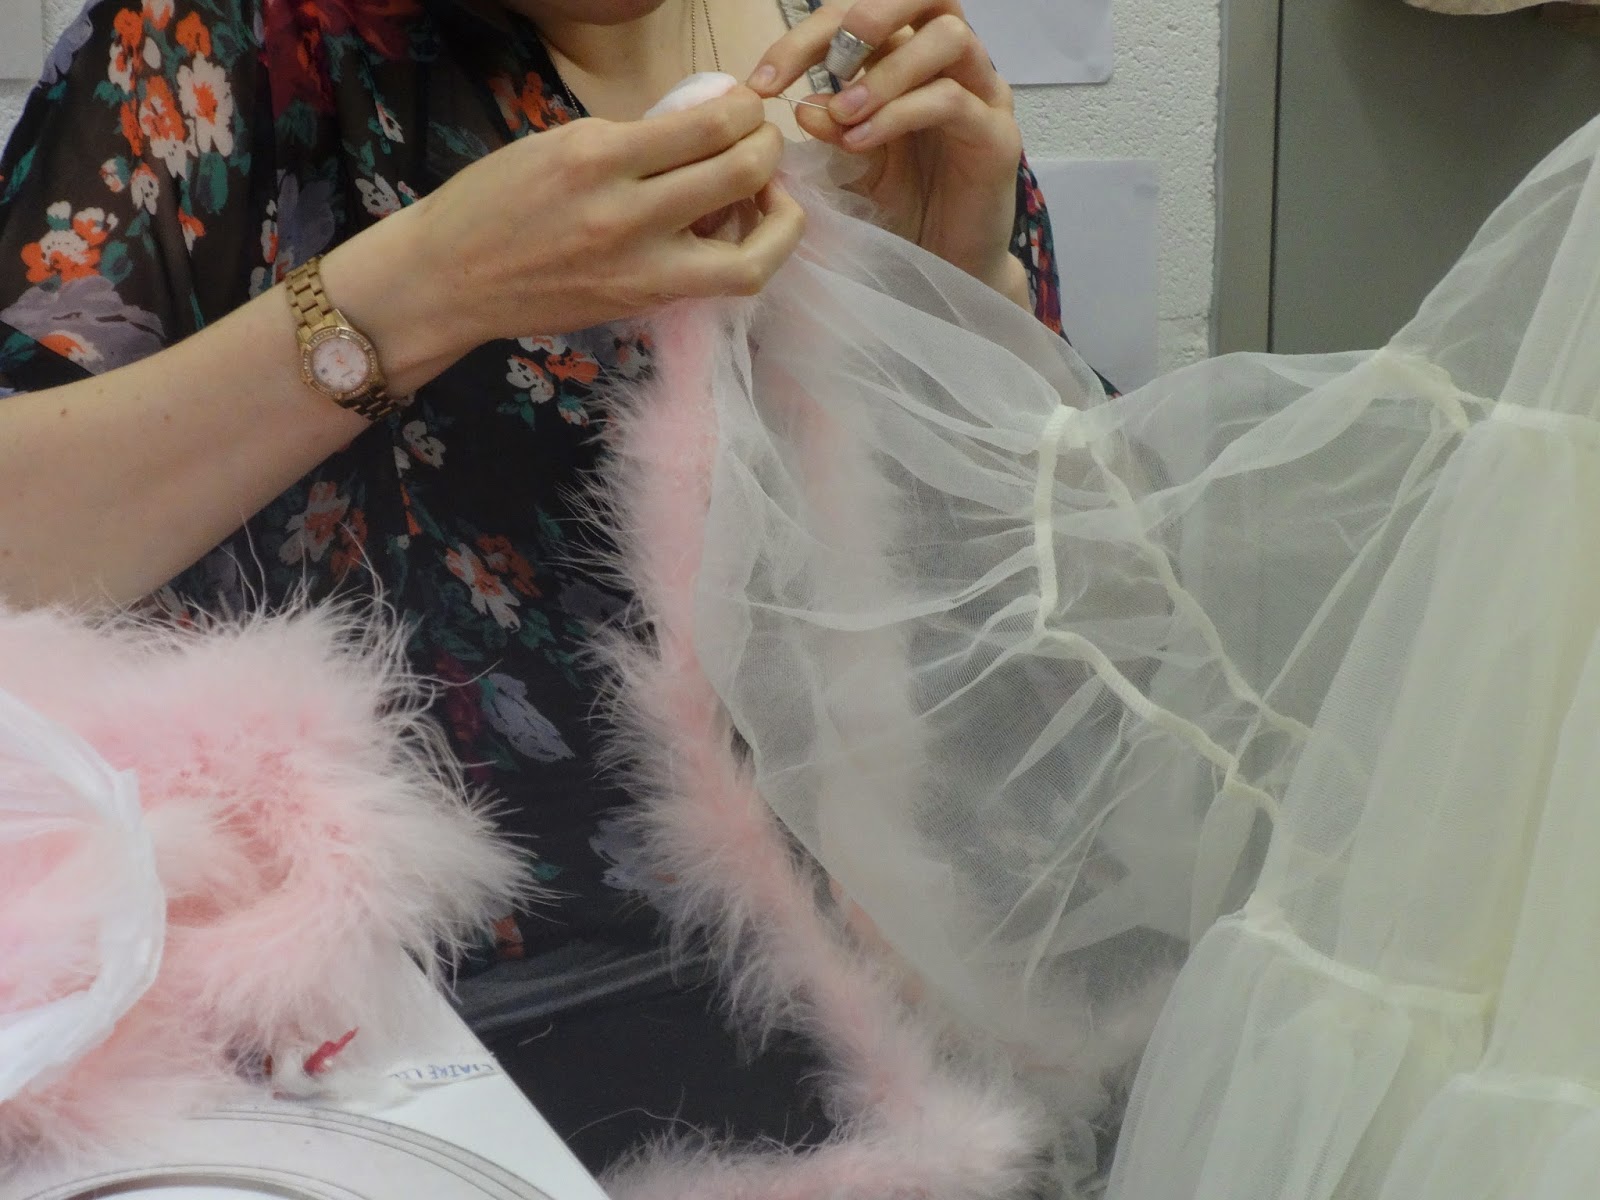
Claire meticulously hand sews on 10 metres of pink marabou trim.  The cream tutu was from Hell Bunny, I dressed it on the mannequin from the bust instead of the waist and it instantly took shape.  A pink sequinned shawl was added to the top for colour, movement and sparkle.
 
 Kerri in full swing in the 'Don't Tell Mama' number.
 
Image : Neil Harrison Photography


My design sketch for 'Mein Herr'.  There are always a few changes to be made from the sketch to the final costume.  Black hose with a red back seam, and shoes soled in red all were essential design details. The top hat was original silk 1930's, but later was replaced with a bowler.


The bodice for Sally's Mein Herr costume started life as a sparkly dress with a centre frilly section.  Once the frills were removed we had to join the bodice and skirt back again.  It was then fitted on Kerri and the pant shape drawn in, cut and sewn.  Because the dress was already boned and lined, this was the best way to produce this design. 
 
A large percentage of the costumes had been sourced from vintage and charity stores and then customised.  This involves a lot of creative thinking, to see a garment for what it could become, rather than how it already exists. 


Kerri looking perfectly marvellous as Sally Bowles in Mein Herr.


Kerri had a lot of costumes and they all had stories to be told.  Choreographer Sarah Johnson had Kerri jumping off tables, climbing over chairs, lying on the ground all within one scene to the dancing piano keys of musical director Matthew Reeve.  Costume has to react to all of this.

 
Costume sketch for 'Cabaret'


£20 mans tuxedo jacket from British Heart Foundation.  I went out that lunchtime, wanting to find this jacket, and I found it! It was exactly the style I needed to work on.


Front view of the waistcoat. Looking a lot more feminine.
 
 
Side view of the waistcoat.  Sides bound in satin.
 
 
Backless waistcoat, completed with suspender strap.
 
 
£8 Skirt from Oxfam Vintage cut into a pair of trousers. 

 
'Cabaret' .  A turban with brooch completes the costume.
 Image Neil Harrison photography.
 
 
In full swing at Cabaret Costume HQ with Gemma and my right hand, left handed woman, Claire Lilley, who deserves a round of applause!
 
 
Read a review...  by clicking on the link.  Feel Willkommen to leave a comment below if you enjoyed the show!
 
Till Act 2, and on with the show.
 
Christine


Wednesday, 9 July 2014

Couch Time

So far this week I have mostly been catching up on sleep after a very eventful and busy week previous.  All shall be revealed in September ;)

I'm spending my evening on the sofa, a tub of icecream has mysteriously melted into my mouth, and the sun has melted into the horizon. With an hour before I turn into a pumpkin, I'm putting it to good use and sharing some couch time.

Often I sit on the couch and think, and then think of things I can change around the house.  I do this to avoid actually doing work.  My living into dining room is open plan and I'm very much into a good flow of energy and movement through my spaces.  But there was a blockage.  I hadn't noticed it in the 9 years I've been in the house, but there it was, the arm rest of the sofa. 


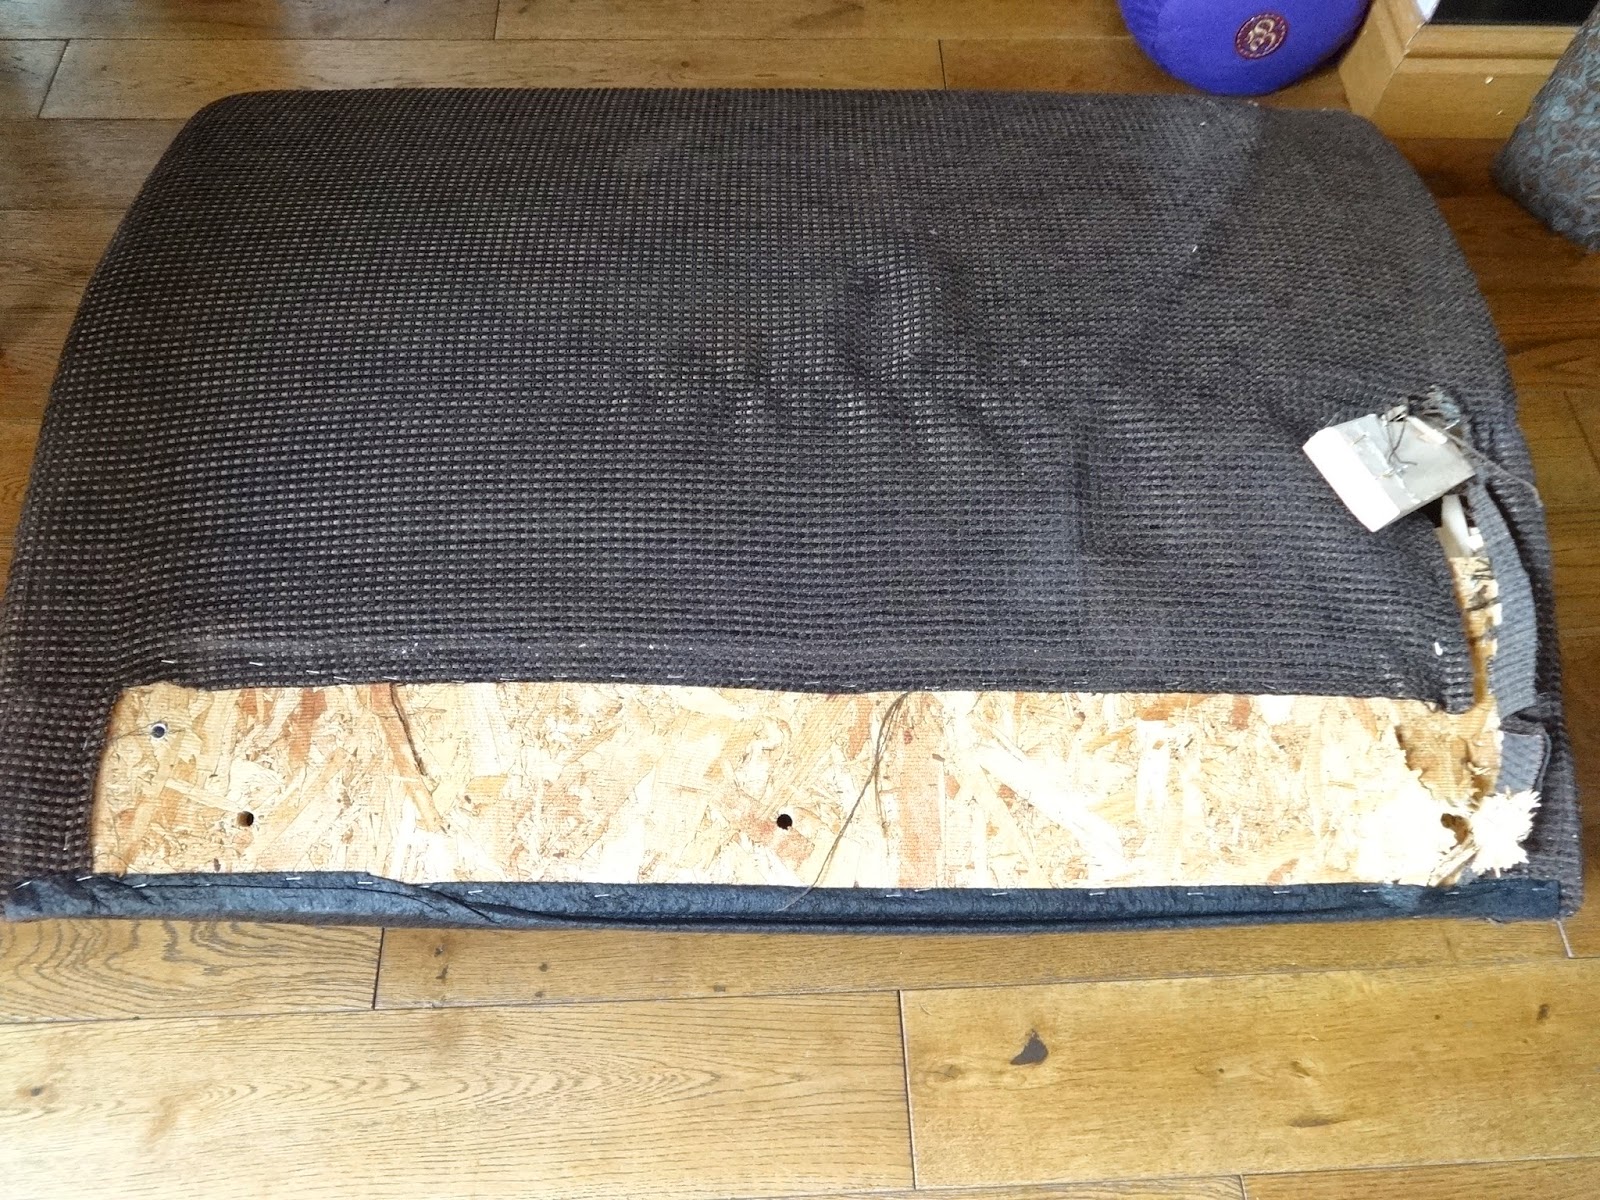
  So I got off the sofa and turned it on its side.
 
 
And sat the cushions back on the floor.  Very uncomfortable after 2 hours watching a film, even though I really enjoy sitting on the floor.


I decided to make a chaise longue.  With drills, screwdrivers and brute force I removed one end.
 
 
Took the remaining fabric and pinned it in place. 
 
 
Hand stitched and staple gunned in place.


The finished sofa.
 
 
Much better view when lying down chilling out.
 
 
I also took the feet off the sofa, lowering it by a few inches, giving a more relaxed height and seating position.
 
Putting my feet up now!
 
Goodnight and keep creating
Christine x


Thursday, 29 May 2014

Give me an inch and I will take a mile. DIY Home

Its not often that there is a bare wall in my house, and if I do see one it doesn't take long until something is getting hammered up.

I found this one last week...


I mean, what did it think it was doing hanging around naked, clothed in no art or mirrors?


And what does a touring map of Ireland, printed in Edinburgh and a bottle of Bushmills got to do with this naked wall?


Yard sticks from Copeland Linens, Belfast which shut up shop last February. Such beautiful wooden rules marked with material memories.


This is how I found the rulers in the factory when it was closing.  I think this is a beautiful scene in itself.  Dockets of fabric purchases, customer orders and the Irish linen draped from a hook.


The wonderful map of Ireland backed in linen which I purchased from Yellow Submarine, Belfast for a few pounds a few months ago.


Off to Ikea for a frame big enough and light enough to protect the old map.


Naked wall now dressed...


Rulers added.  Its all distance and measurements.


The finished frame.

Break the rules and do it differently!

Happy Creating and making

Till next time,
Christine x


Tuesday, 29 April 2014

DIY - by hook or by crook


Its been a long time, nearly 4 months since my last post...I feel like I'm lowering my head and confessing.  But I know I'm always full of NY promises that I will blog more often, but it never happens! Please forgive, ... hopefully they are worth waiting for.
 
Recently Colour and Cloth has expanded into Colour Cloth and Craft, because that's just the way it was heading.  All 3 C words encompassing a wide expanse of materials that I can post about.  I'm not only interested in Colour and Cloth, I love DIY, woodwork, poetry, painting, sketching, gardening and baking, all of which are crafts in their own beautiful way. (lots of influences from my folks and grand folks).  So I really felt the need to expand, hopefully opening up in many avenues and interests.
 
Today its DIY, which I get from my good ol' da Andrew Boyle. 
When I was younger I helped dad put the wallpaper paste on the anaglypta Graeme and Browne wallpaper (what goes up, must come down, Super Fresco make it easy with G&B...you remember?!), and helped him paint the chip wood magnolia.  Despite many differences, I am still 1 of 'daddys 4 girls' ;)
 
So when its comes to DIY, I'm always looking around for new projects to get stuck into.


I had found this hat stand in a alley near my house (I was putting my bin out before you ask...I don't normally frequent alleyways), rescued it and sprayed it black.


Got bored with it after a few years and wanted to see my scarves so I can actually wear them!


New drill out...best purchase last year. Out come the screws.
 
 
Level off the pole


To make a table for my bedtime reading ;)
 
 
Silky scarves in the bedroom.... ;)
 
 
Turn it on its side and it becomes a tie back for the wardrobe curtain :)


Hope you all enjoyed the post.  I'll not promise to write again for a while so I don't disappoint!!
 
Till we meet again
 
Happy CCC x from CB


Thursday, 9 January 2014

Mannequin making - Sleeves

Its Thursday, my favourite day of the week, and I'm up early and posting my 2nd blog in a week...am I feeling ill?!

I'm not fully back to work yet so am making the most of having free time by bulk cooking and freezing meals so I have food to eat after a long day at work. 

One of the projects I got up to at the end of last year was more Mannequin making, but this time focusing on one particular limb, the arm.

It came about as I was finding it difficult to make a lining pattern for a jacket I was altering.
I teach Dressmaking in Belfast Met on a Monday and borrowed their detachable arm one evening, returning it the next day. A strange sight was a rigor mortis arm tucked sticking out of my backpack while cycling home.  It was a wonder I wasn't stopped and questioned. 


I needed to recreate this arm.  I find thinking always a lot easier with a cup of tea :)
 
 
I love the old dress stands and parts, stains and all. They are so expensive though!
 
 
I cut some calico (cotton) fabric on the bias (stretch cross grain).  The bias makes it easier to mold the fabric over the arms curves.  I marked where fullness needed removed around the elbow with a dart.  The armhole socket and the wrist were traced onto calico forming 2 circles.
 
 
By pinning the fabric in place it allowed me to make final alteration so I could achieve a very close fit.  I made a paper pattern, adding 1cm seam allowances and re-cut out. 
 
The dart was made and the sleeve was machine stitched in place.  Then stuffed tightly with polywadding until the amount of firmness needed was achieved.  I forgot to take photographs of these stages! 
 
The end circles were handstitched firmly in place and the arm was given a good steam with an iron to make it fit and sit.


Side view.  I pinned my arm to my stand using leather pins.  The pins need to be strong and secure the arm in place when using to fit a garment.
 
 
Front view.  A view lumps and bumps, but sure haven't we all!
 
 
I was now able to create a sleeve lining pattern a lot easier than before as this fabric was really soft and didn't hold a sleeve shape on its own.
 
 
Finished jacket.


Hope you enjoyed the post and it encourages you to make your own. 
 
Until next time
 
Happy Creating!
Christine x


Friday, 3 January 2014

New Year, New Wardrobe!

Happy New Year to you all ... I've a feeling that its going to be a good one!

2014 is a very significant year for me... I was born in 1974 and that means I'm turning 40 in April!  I'm really looking forward to it!

New Years always means a good clear out. The last pine needle of the tree has been brushed outside ( although Im sure I will still be finding them for the next few months in the house) the decorations are down, the house is sparkling, focus turns to a good wardrobe clearout.  Or as its called in Northern Ireland, 'a good read out'. (said as 'red')

Back in September I had decided to rip out my wardrobe, so armed with tools, wrenches, hammers and many other gadgets I rolled up my sleeves and set to work.


These were the 2 doors before

 
With the door frames only coming up so far it meant there was a lot of wasted space. When you live in a 2 bedroomed 1920s terrace and own a lot of clothes, every bit of space is important.

 
These nails were SO big, and took a lot of struggling with to get them free from the door frame.

 
All my clothes had to go into the spare room until the job was done.

 
A very messy bedroom floor!

 
All the woodwork off from the door frames

 
I used some of the better pieces of wood from the door frame for another clothes related project. I will share that in another post.

 
At this stage I could do no more.  The next stage involved finding a good tradesman and I found https://www.facebook.com/HandyMattNI?fref=ts'  Handy Matt' by facebook.  

 
Where the shadow is was wasted space.


Matt took away the partition wall in the middle, checking that the ceiling wouldn't fall in first and then did a bit of plastering. 


Then rails and shelves were added.  A curtain rail was put up.  I stitched curtain tape to a very large old Irish linen tablecloth and hung it as the wardrobe closure.

 
All the vacuuming done, and the clothes are hung in place.  Making full use of every inch of space.

 
BEFORE


AFTER
 ...I added the tie back today. 


Now that the wardrobe structure was finished, and the New Year and all its resolutions had been made it was time for a wardrobe clear out. My sister Linda of 'Hey!Homewrecker' came over last night and hanger by hanger went through the rails.  Somethings require the losing of a little weight to fit back into so its back into running and yoga as of next week.
 
Today I left 3 bags full into Oxfam :)


It was decided that no more charity and vintage shops are to be visited, and that although I have lots of really nice clothes, I have no basics!
 
A trip into the shops, January sales in full swing, led to me coming straight home, having bought nothing only an M&S pastry to console myself after having to deal with the nightmare that is high street shopping.
 
The kettle called to be put on, the tea was poured and up to my bedroom I went, plugged in the laptop, logged into La redoute, and shopped online for colourful basics.  Bliss ....
 
 
This little pouch is from the 'House of Colour' when you get your skin tone and hair colour assessed and shown all the colours that suit you best. Handy to have when wardrobe shopping.


The final curtain. 
Night night
 
xx